Pin bar trading strategy: the rules that separate good pins from noise
The pin bar is the most famous candle in price action, and most of the ones you'll see mean nothing. The pins that work aren't special because of their shape. They're special because of where they form and what else agrees with them.
What is a pin bar?
A pin bar (short for Pinocchio bar) is a candle with a long tail, a small body near one end, and a small nose. It shows price being pushed one way and then rejected. A bullish pin has its tail below: sellers drove price down, buyers threw it back. A bearish pin has its tail above.
The five rules a real pin must pass
These are the rules TTL Pin Bar Hybrid Pro uses by default. They're strict on purpose, because a loose definition finds a “pin” on every other candle.
| Rule | Default | Why |
|---|---|---|
| Tail | At least two-thirds of the candle's range | That's the rejection. Price went there and was pushed back hard. |
| Body | At most a third of the range, either colour | A big body means the candle travelled. A pin is about rejection. |
| Nose | At most 20% of the range | A pin closes near its far end. A long nose makes it a spinning top. |
| Size | Range at least 0.8 × ATR | Tiny candles in a quiet market look like pins but carry no information. |
| Sticks out | Tail beyond the last 3 candles | The tail must reach new ground. A pin buried inside recent candles rejected nothing. |
Where pin bars work: location, location, location
A pin bar in the middle of a range is noise. A pin bar at a level where orders sit is a story. The best locations:
- The previous day's or week's high or low.
- Round numbers: 1.3000 on GBPUSD, $10 levels on gold.
- Untaken swing highs and lows, where stops are waiting.
The strongest pins sweep that level: the tail runs the stops beyond it and the candle closes back inside. That's a liquidity sweep drawn as a single candle.
Seven pieces of evidence
Once a candle passes the rules, ask what else agrees with it. Pin Bar Hybrid Pro scores every pin on seven points, and you can use the same checklist by eye:
- Trend: price is on the right side of the 50 and 200 EMAs for the pin's direction.
- Higher-timeframe trend: the next timeframe up agrees.
- Key level: the tail reached one of the levels above.
- Sweep: the tail took out the highest high or lowest low of the last 20 candles.
- Quality: a textbook pin, tail at least 75% of the range and the range at least 1 × ATR.
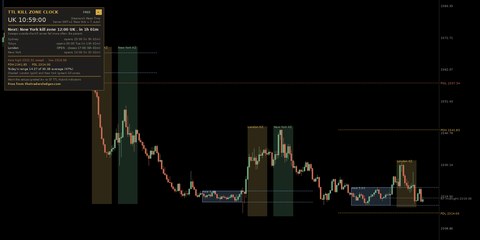
- Kill zone: on M1 to H1, the pin formed in the London (07:00–10:00 UK) or New York (12:00–15:00 UK) window.
- Volume: tick volume at least 1.5 × the average of the last 20 candles.
A pin with five or more of these is worth your attention. A pin with one or two is a candle.
Entry, stop and targets
- Entry: a stop order just beyond the nose (above the high of a bullish pin, plus the spread). Price has to confirm the rejection by breaking the pin. The alternative is a limit order at 50% of the pin: a better price and a smaller stop, but many pins never come back to fill it.
- Cancel it if the entry isn't hit within about three candles, or if the tail is broken first.
- Stop: beyond the tip of the tail, plus a small buffer (a tenth of the ATR) and the spread.
- First target: the nearest liquidity at least 1R away, such as a swing high, the previous day's high or the next round number. If there's nothing, 2R.
- Second target: the next level beyond. Many traders take half at the first target and move the stop to breakeven.
Then size it properly: how to calculate lot size shows how, and pin bar stops on gold are often wider than you'd expect (see gold lot sizes explained).
Which timeframe is best for pin bars?
Pins on H4 and D1 are generally the most reliable, because more traders see them and they need more money to form. They're also rarer. M15 and H1 pins give more trades, but they work best inside the kill zones and in the direction of the higher-timeframe trend. A practical approach: read the trend on H4 or D1, and take M15 or H1 pins that agree with it.
Five mistakes that make pin bars fail
- Trading every long wick. If it fails the rules, it isn't a pin.
- Ignoring location. No level, no trade.
- Fighting a strong trend. A bullish pin in a steep downtrend is usually a pause, not a turn.
- Entering before the candle closes. A pin only exists once its candle has closed. Until then it's a wick that might disappear.
- Stops inside the tail. The tail is the rejection. Put the stop beyond it, or skip the trade.
Let the indicator find, grade and track every pin
TTL Pin Bar Hybrid Pro scans up to six timeframes at once, grades every pin A+ to D on these seven points, and alerts you with the entry, stop and targets. MT4 and MT5, £49 once.
See Pin Bar Hybrid ProThe Trader's Ledger has a Pin Bar Reversal setup card, so you can log every pin you take and see your real win rate and R by timeframe and grade. It comes with a free 49-page trading course: see The Trader's Ledger.
Frequently asked questions
What is a pin bar in trading?
A candle with a long tail, a small body near one end and a small nose, showing that price was pushed one way and rejected. A bullish pin has its tail below; a bearish pin has its tail above.
Does the colour of a pin bar matter?
Not much. A bullish pin with a bullish (green) body is slightly stronger, but the tail and the location matter far more than the colour.
What is the best timeframe for pin bars?
H4 and D1 pins tend to be the most reliable. M15 and H1 pins work best in the London and New York kill zones and with the higher-timeframe trend.
Where should I put my stop on a pin bar?
Beyond the tip of the tail, with a small buffer and the spread added. If that stop is too wide for your risk, use a smaller lot size or skip the trade.
Are pin bars reliable?
On their own, not very. Pin bars at a key level, with the trend, after a sweep of liquidity, are much better. Journal them and let your own results tell you which ones work.
Educational content only, not financial advice. Trading carries a high level of risk and you can lose more than you expect. Examples use illustrative prices.